
INSTRUCTIONS FOR INSTALLING AQUACULTURE ROUND TANK
- The Aquaculture Round Tanks have a diameter ranging from 8m to 40m and a height from 1.2m to 2m, depending on customer requirements.
- To install the Aquaculture Round Tank easily and quickly, simply follow these steps:
Here are the steps for installing the Aquaculture round tank:
STEP 1: PREPARE THE GROUND:
+ The surface can be prepared on a concrete base, loamy soil, or sandy soil. Level the ground and clean it of sharp objects like stones, twigs, or gravel to prevent these from wearing down or puncturing the tank liner over time.
+ Create a 2-5% slope towards the tank's center (bottom) to ensure effective waste collection.
+ Reinforce the surrounding soil to prevent erosion during operation.
+ Ensure that the bottom drain pipe or fishbone system is properly placed to efficiently collect water from the tank bottom during use.
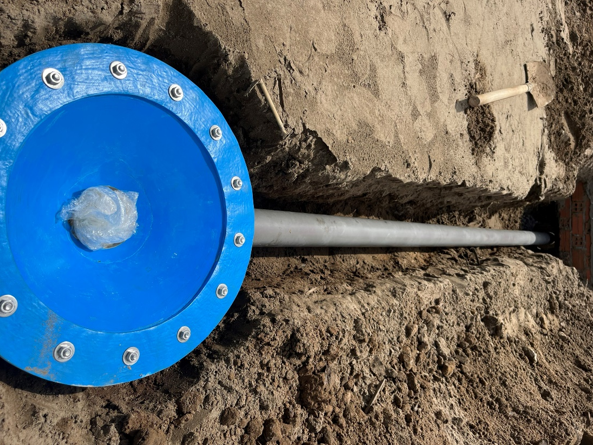
Image 1: Installing the bottom drainage system
Clip 1: Cleaning the surface of sharp objects like stones, twigs, or gravel
STEP 2: INSTALL THE STEEL MESH FRAME AND STRUCTURAL FRAME:
1. Mark the center and diameter of the round tank to be installed and draw the corresponding circle.
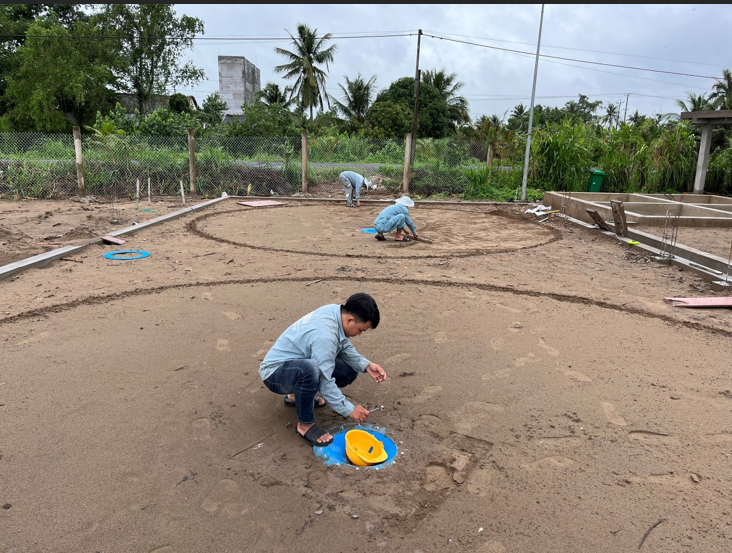
Image 2: Drawing the circle and creating a slope towards the siphon hole center.
2. Assemble the steel frame around the perimeter of the marked circle.
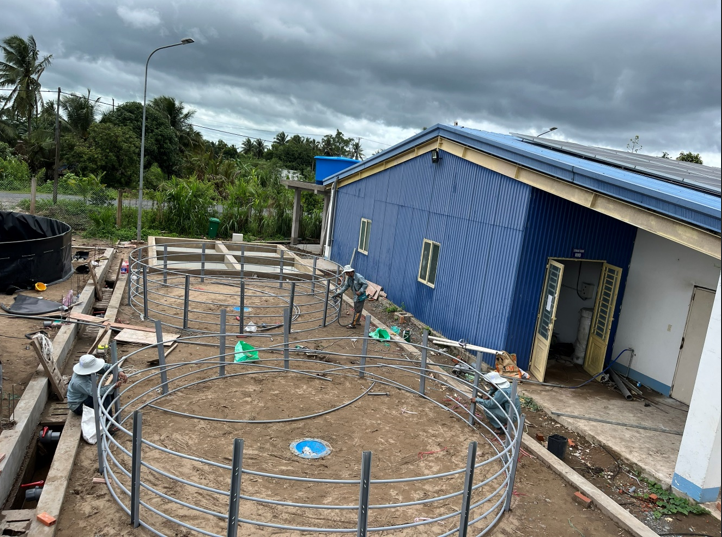
Image 3: Assembling the steel frame
3. Spread wire mesh or steel mesh around the frame to evenly distribute force and reduce friction between the frame and the tank liner, thus preventing the liner from tearing during future use.
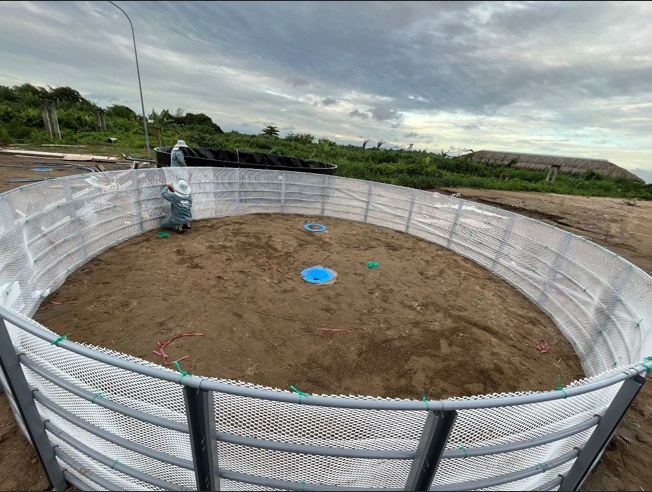
Image 4: Spreading wire mesh around the frame
STEP 3: USE A WATER LEVEL PIPE TO LEVEL THE FRAME:
- Use a water level pipe to ensure that the frame's edge is at the same height at all points (e.g., points 1, 2, 3, 4, 5, 6, 7, and 8). This can be achieved by adding soil or sand under the frame at low points and removing soil or sand under the frame at high points.
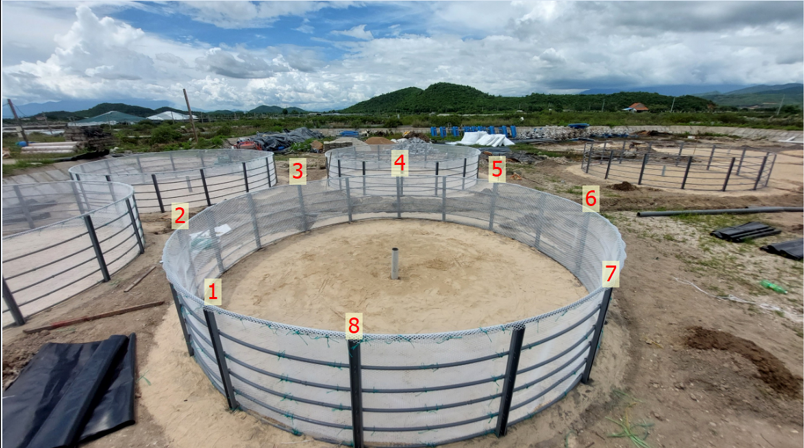
Image 5: Using a water level pipe to level all points
Note: If multiple tanks are being installed on the same surface, make sure that all tank edges are at the same height, unless the customer specifies otherwise.
STEP 4: LAY THE LINER AND COMPLETE THE INSTALLATION
1. Remove the packaging from the tank liner, stand the tank liner upright, and then place it inside the steel mesh frame.
2. Fold the liner's edges and secure them with white nylon string.
3. Finalize the installation and clean the construction area.
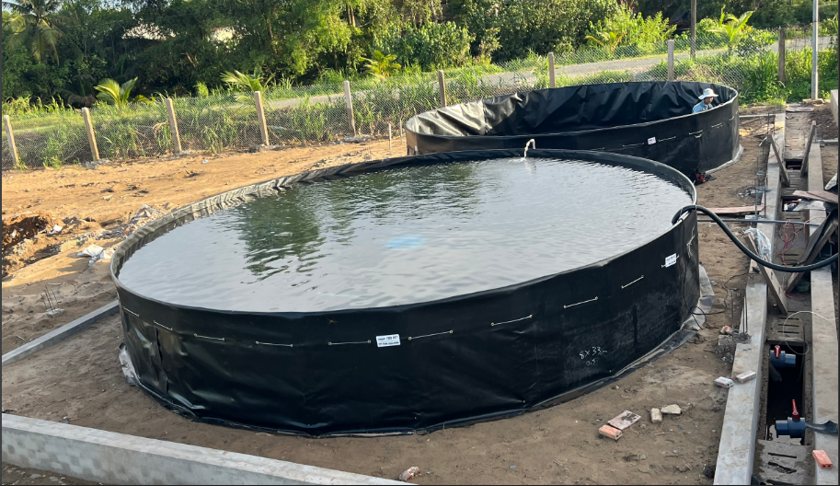
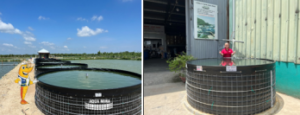
Image 6: Completed installation of the round tank
WE WORK FOR YOUR SUCCESS!
Ngày đăng : 19/08/2024
3097 View


Other Articles
Agriculture & Environment: Key Priorities for H2 2026
HDPE Liner – The Foundation for Sustainable Aquaculture Models
New Generation Paddlewheel Aerator Officially Available at AQUA MINA
Exported Whiteleg Shrimp: Quality Proven from the Farming Source Viet Nam
Whiteleg Shrimp Prices Plunge: Mekong Delta Market Shows No Signs of Recovery
Should you choose a circular tank or a geomembrane-lined reservoir? How many years can an HDPE-lined reservoir last?
Special Guests Visit AQUA MINA – When Trust Leads the Way to Unexpected Encounters
New Opportunities with the Domesticated Black Tiger Shrimp Farming Model
Saudi Arabia lifts temporary suspension on Indonesian shrimp imports
Why are many growers switching to HDPE-lined ponds instead of traditional earthen ponds?
The world's thirst for shrimp is killing Ecuador's mangroves
The 12.5% Tariff and a New Challenge for Vietnamese Seafood in the U.S. Market


.jpg)