
INSTRUCTIONS FOR INSTALLING AQUACULTURE ROUND TANK
- The Aquaculture Round Tanks have a diameter ranging from 8m to 40m and a height from 1.2m to 2m, depending on customer requirements.
- To install the Aquaculture Round Tank easily and quickly, simply follow these steps:
Here are the steps for installing the Aquaculture round tank:
STEP 1: PREPARE THE GROUND:
+ The surface can be prepared on a concrete base, loamy soil, or sandy soil. Level the ground and clean it of sharp objects like stones, twigs, or gravel to prevent these from wearing down or puncturing the tank liner over time.
+ Create a 2-5% slope towards the tank's center (bottom) to ensure effective waste collection.
+ Reinforce the surrounding soil to prevent erosion during operation.
+ Ensure that the bottom drain pipe or fishbone system is properly placed to efficiently collect water from the tank bottom during use.
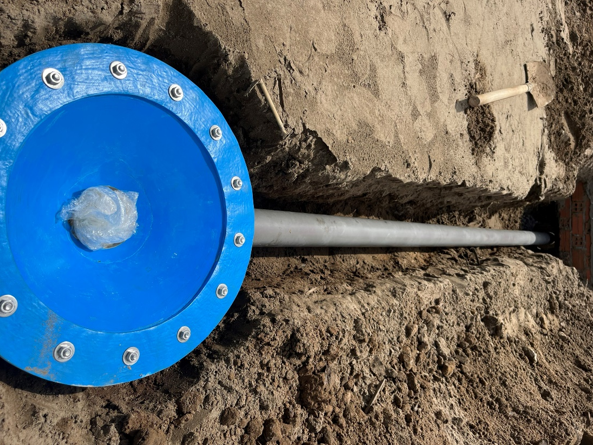
Image 1: Installing the bottom drainage system
Clip 1: Cleaning the surface of sharp objects like stones, twigs, or gravel
STEP 2: INSTALL THE STEEL MESH FRAME AND STRUCTURAL FRAME:
1. Mark the center and diameter of the round tank to be installed and draw the corresponding circle.
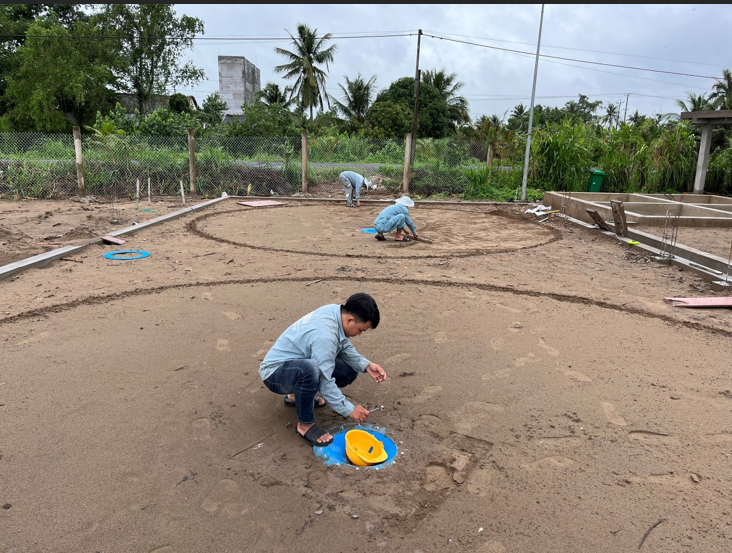
Image 2: Drawing the circle and creating a slope towards the siphon hole center.
2. Assemble the steel frame around the perimeter of the marked circle.
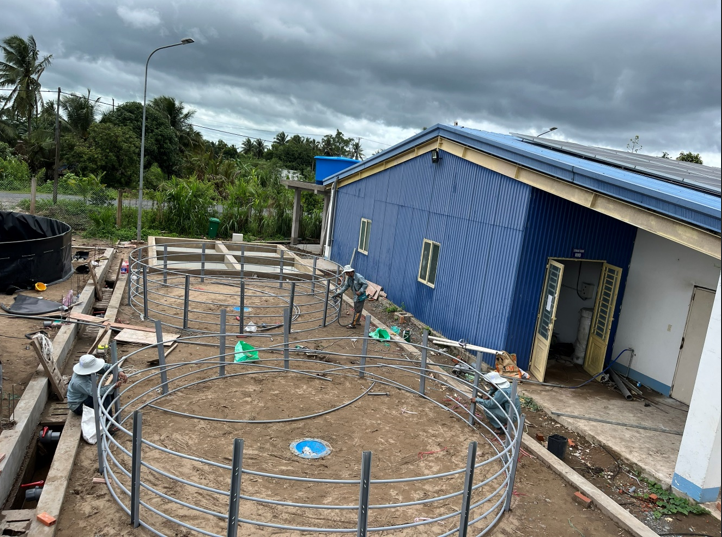
Image 3: Assembling the steel frame
3. Spread wire mesh or steel mesh around the frame to evenly distribute force and reduce friction between the frame and the tank liner, thus preventing the liner from tearing during future use.
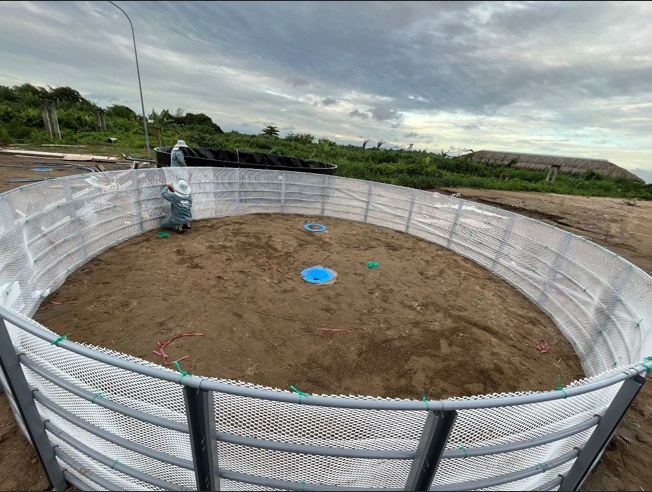
Image 4: Spreading wire mesh around the frame
STEP 3: USE A WATER LEVEL PIPE TO LEVEL THE FRAME:
- Use a water level pipe to ensure that the frame's edge is at the same height at all points (e.g., points 1, 2, 3, 4, 5, 6, 7, and 8). This can be achieved by adding soil or sand under the frame at low points and removing soil or sand under the frame at high points.
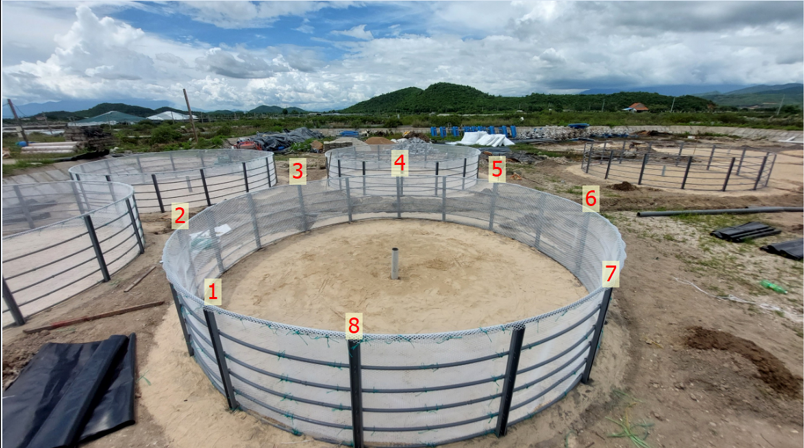
Image 5: Using a water level pipe to level all points
Note: If multiple tanks are being installed on the same surface, make sure that all tank edges are at the same height, unless the customer specifies otherwise.
STEP 4: LAY THE LINER AND COMPLETE THE INSTALLATION
1. Remove the packaging from the tank liner, stand the tank liner upright, and then place it inside the steel mesh frame.
2. Fold the liner's edges and secure them with white nylon string.
3. Finalize the installation and clean the construction area.
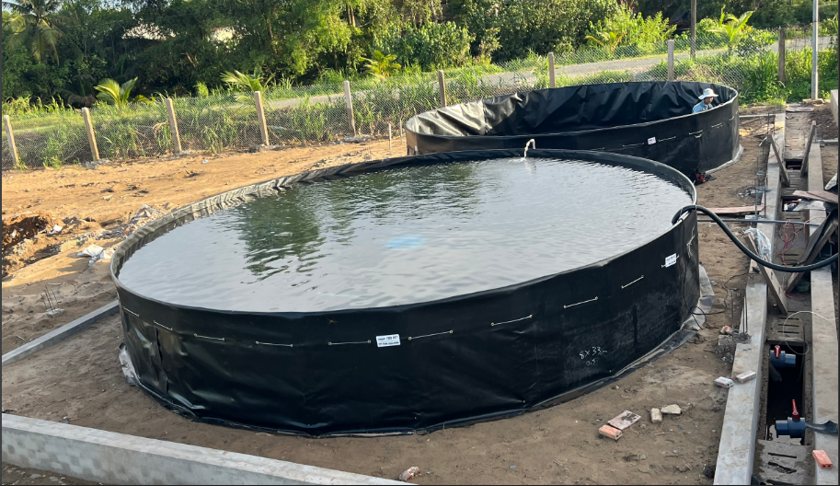
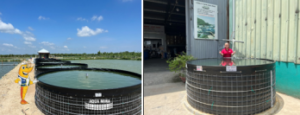
Image 6: Completed installation of the round tank
WE WORK FOR YOUR SUCCESS!
Ngày đăng : 19/08/2024
2874 View


Other Articles
Đồng Tháp: Canal bank erosion causes over 5 billion VND in property damage to residents
Indonesia accelerates the expansion of its global seafood market share
Secrets to Enhancing the Durability of TURBO AQUA MINA Aquaculture Air Blowers
Vietnam’s shrimp exports to the UK: Growth potential in a highly competitive market
Shrimp prices drop sharply, farmers worry about unprofitable farming
AQUA MINA | CELEBRATING THE 67TH ANNIVERSARY OF VIETNAM’S TRADITIONAL FISHERIES DAY
Restructuring seed production to enhance the competitiveness of the aquaculture industry
AQUA MINA COMMITS TO NO PRICE INCREASE – 15% OFF PVC Knife Gate Valves, Double Flanges, and Elbow Flanges TO SUPPORT SHRIMP AND FISH FARMERS
Global shrimp prices – Week 12: Ecuador shrimp prices recover, while India and Indonesia remain stable
The global surimi market is projected to grow strongly.
Cà Mau: Expanding the RAS-IMTA model toward sustainable, zero-discharge shrimp farming.
From seed stock to farming equipment, high-tech aquaculture attracts strong interest in Ho Chi Minh City


.jpg)